|
|
Formwork for waterproof concrete must not require kickers.
Formwork for waterproof concrete should not leave holes.
The formwork has to let the concrete get to the bottom in good condition and let the poker get to the bottom to compact it properly.
The formwork must be removed to inspect the concrete.
|
|
|
We sell:
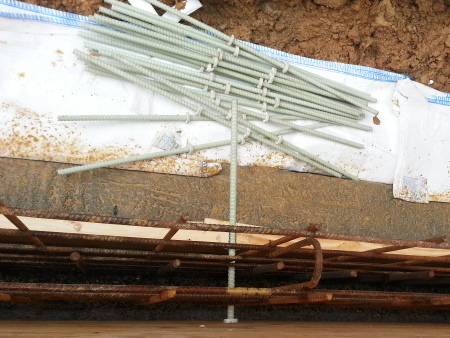
Fibre glass rod, cast in leaving no holes
Thin nuts set to control the concrete width
Big nuts to hold the formwork together,
An adaptation of these items to create a slab levelling system.
and
Steel waler plates.
Please go to the Basement Expert web site for more information about purchasing.
|
|
|
|
|
|
Please note. The author acknowledges all the trademarks it mentions on this site.
|
|
|
|
|
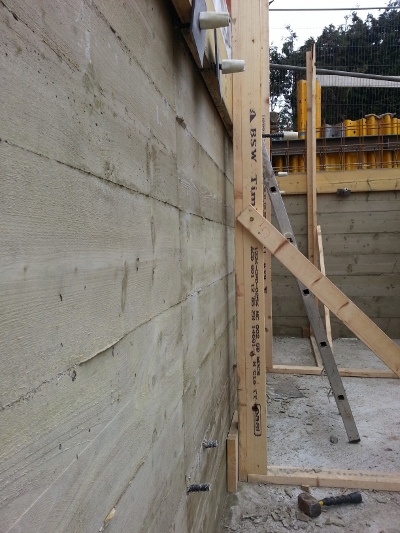
I devised a very cheap, re-usable formwork that fits the bill for DIYers. And, actually, there are parts of it that the most experienced formwork carpenters like as well.
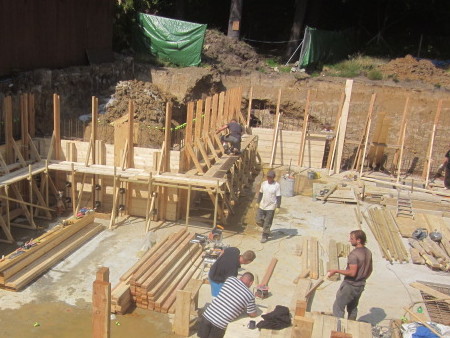
Successful waterproof concrete demands half wall height formwork, without kickers and leaving no holes through the wall as well as removing the formwork to inspect the concrete for flaws.
The self builder wants a formwork that is easily re-used, without a crane, and is strong enough for fluid concrete to be thoroughly vibrated.
He wants to buy that formwork so he can take as long as he wants and to be able to re use or re sell almost everything at the end.
- unbanded scaffold boards or treated 6x2,
- 6x2 upright strongbacks
- 4x2 for props and alignment,
- waler plates,
-
threaded glass fibre (FRP) threaded rod and nuts, and
- only semi skilled labour.
|
|
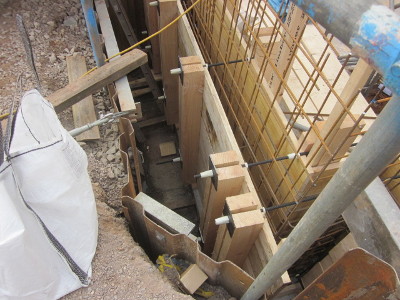
Strike the brace, only 5 screws, to remove the first formwork. Remake the brace and continue up.
|

|
|
Form the holes with short lengths of roof batten screwed down with 3 wood screws.
|
|
|
Professional Formwork
If you are competent, fast and hard-working, hiring a pan system will be cheaper.
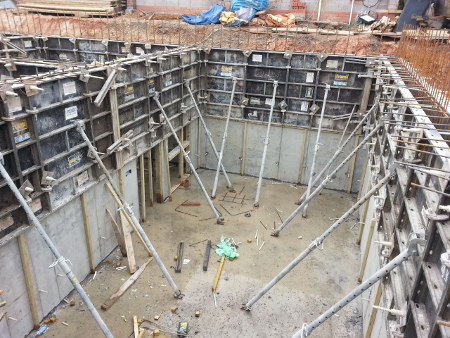
This is a Doka system hired from Mabey.
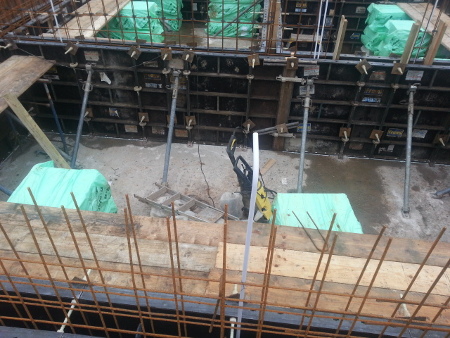
Note that the clamps at the bottom are replacing the need for a kicker.
It is essential that the formwork is used twice to pour less than 2m high each time. You cannot poker 3m deep properly, pokers are too twisty as well as too heavy. Also you are far more likely to get the concrete past the steel to the bottom in good condition.
You need the push pulls to hold it upright.
Advantages:
-
Faster to form
-
Easier to clean
-
Faster to strike
Disadvantages:
-
The larger pans weigh 70kgs
-
Usually a minimum hire period of 4 weeks
-
Transport to and transport fro, which can be more because you may not have the space to load a lorry efficiently
-
Cranes required for second wall lift and to load lorry
-
You may go over the minimum hire period
-
lost and damaged items are expensive
-
If you ask the hire company to tell you what you need they tend to send, and charge you for, more than you need
-
It is a hire, you have nothing to sell at the end
-
Cleaning charges will be applied if you do not clean well at the end of each pour. You can see the pressure washer ready to go in the top picture
-
You cannot reclaim VAT on the hire of plant, tools or equipment.
|
|
You require
-
threaded resin rods
- thin threaded resin nuts
- big threaded resin nuts
-
6x2 timber upright posts.
-
steel waler plates
- scaffold boards without end straps.
- 19mm x 38mm roofing batten to cut in between the rods to form holes
- 4x2 for props
- 2x2 for corners
- 18mm ply to hold boards where they meet.
- Screwfix Turbo Coach Screws
(Screwfix because they have washered hex heads).
|
|
-
buy from us, cast them in the concrete
- optional, buy from us, cast them in the concrete
- buy from us, resaleable
-
buy yourself, resaleable
-
buy or hire yourself, or buy ours, ours are returnable
- buy yourself, resaleable
- buy yourself, throw away at the end
- buy yourself, almost certainly re use in the building
- buy yourself, keep
- buy yourself, resaleable sometimes
- buy yourself, resaleable sometimes
|
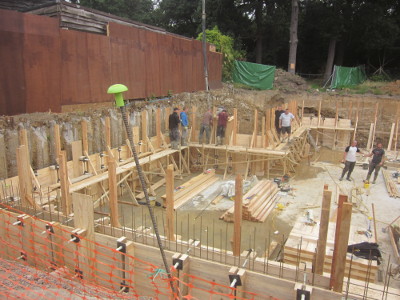
Everything is completely flexible, except for the rules at the top of the page
(no kickers etc.).
Good access for concrete and pokers means a maximum of 2m high each time.
Props a maximum of 2m centres
or a maximum of 1200mm centres if they are your scaffold.
Rods a maximum of 1m apart and 2 rods high per pour. More if into poor concrete such as piles.
|
|
-
Single sided with the rods resin anchored into piles or underpinning.
-
Double sided if free standing or a retaining wall.
-
Props whatever height you like.
-
Diagonal braces whatever length or angle you want.
-
You can strike the timber and re-use it many times, or leave it in place longer and use more timber but less labour.
-
You can use the props and braces for scaffold for the first pour.
Be careful to oil one side of the board well before each use, else they can be difficult to clean.
|
Note that where scaffold board ends meet you need a ply strap over the joint to prevent it opening up under the weight of concrete.
Ply needs to go over joints and be screwed to every board so that the screws don't interfere with the 6x2s, and a rod needs to go through to hold the internal board ends in. This means that the outside may bow out ever so slightly which should not matter.
|
|


